Mirror Stamping with the MISTI

Hello, everyone!

I am back with a quick post and video on how you can use your MISTI for mirror stamping, or for stamping on the back and front of your die cuts. Sometimes there can be layouts of cards where you use stamped die cuts or trims on top of a clear window and when you open your card you can see the back of that piece as a plain white piece of paper. If you want to have some decorations on the back of your trims, you can use this trick that I used for today’s card.

I discovered this by pure accident, while stamping with my MISTI. If you don’t have the MISTI, you can use a piece of craft foam or some larger acrylic stamps and there are a lot of great tutorials out there on mirror stamping that you can learn from.20161025_125707For this technique I used the foam mat that comes with the MISTI and stamped my image right on top of  it 2 -3 times with the Versafine Ink that is a pretty juicy ink. I need the image to be as wet as it can so I can lift that ink on my paper also. After I stamped the image on the mat I placed my cardstock right on top and stamped one more time, but this time on top of the cardstock. Make sure to add a bit of pressure and give that ink a couple of seconds to lift on the back of your cardstock. The image that you have stamped on the mat may not have very crisp lines, but you can always use a marker to go over the lines. The lines are not crisp because the mat is soft and once you press your stamp onto it, the image kind of expands. Using a sturdyer surface, like an acrylic stamp, makes the lines of your stamped image much more crisp.

20161025_125815

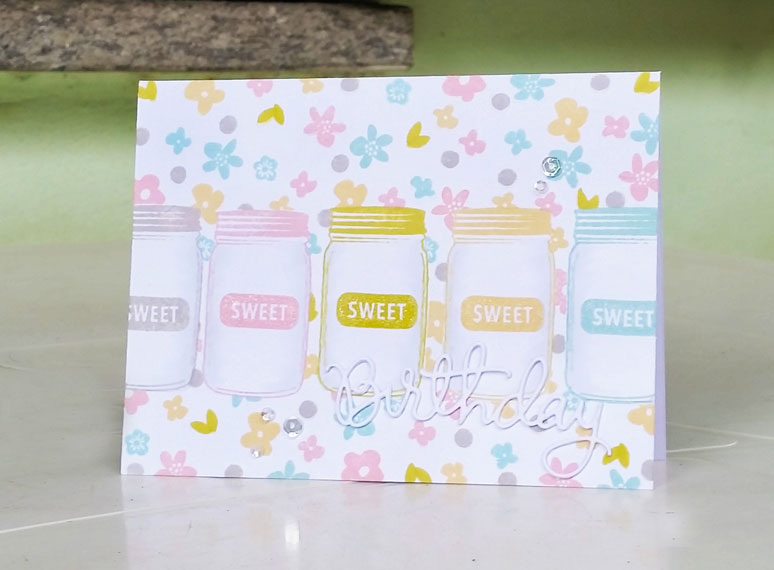
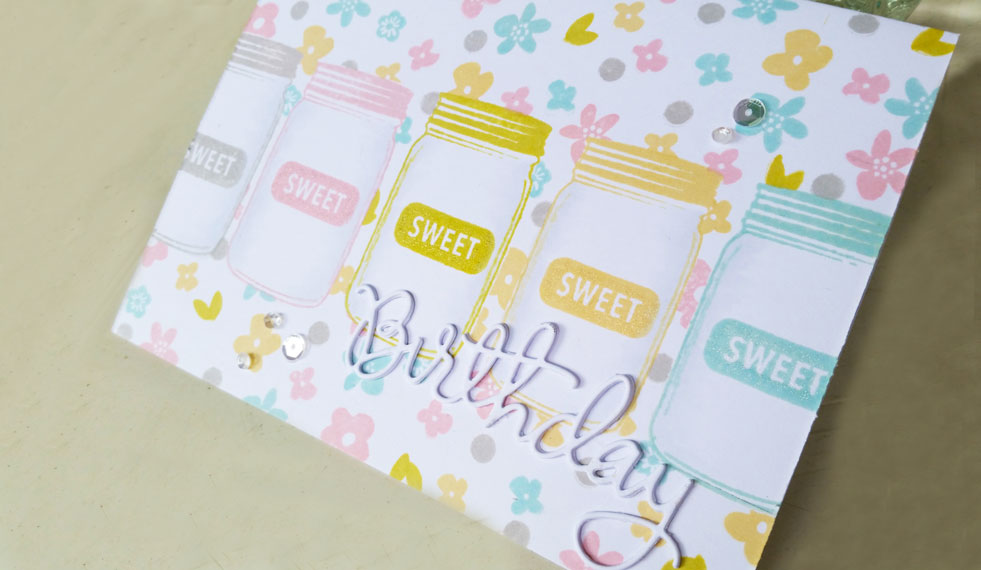
I used my coloring pencils for a quick coloring and added a bit of shimmer on top of the gift packages with my clear Wink of Stella. Next I die cut a circle window on the front of my card, decorated the front of the card with some patterned paper and used a piece of vellum for my circle window. For my sentiment I did some heat embossing and to finish it all I added some Nuvo Drops and a dashed line with my white gel pen.

20161025_125721

You can watch the how-to video down below or HERE on my YouTube channel.

Thanks so much for stopping by and will see you soon with a new project!

https://static.inlinkz.com/ppr.js

Birthday Card | Masking & Mixing Stamp Sets

Happy Friday, friends!

Back on the blog today for sharing a cute & fun birthday card that I made mixing two lovely stamp sets. I had both sets for a while and never had time to use them and I was so happy to see that I can mix them both to create the card for today. Once I used that bushel stamp from the Altenew set, dozens of ideas came into my mind, like I could put anything that I want inside the bushel and it would be just so fun! Have to search for some tiny pumpkins stamps:))

I started by stamping the bushel onto a watercolor panel and also onto a piece of post it that I used as a mask. I covered the initial image with my mask and I was able to stamp the cute darling elephant inside the bushel, like he was sitting in a tiny tiny swimming pool. This card made me giggle:))20160922_141829Next I used my watercolors for coloring all the stamped images and the background and then I stamped some balloons here and there as the card just seemed so plain to me 😀

Once everything was dry, I added a bit of shimmer and my loved clear sequins from Simon Says Stamp.20160922_141845

This card was just so fun to make and I’m sure that you all have some stamps that you can mix together even if they don’t seem to match at a first look. You’ll be surprised! 🙂

I’m entering my card in the Simon Says Stamp Work It Wednesday Challenge

You can watch the video tutorial on my blog or HERE on my YouTube channel. Supplies are listed below (affiliate links are used where possible)

SSS September Card Kit 2015 Day 5

Yay, I made it to finally finish this mini series! Man, it took forever, lol:))

I have a set of quick & easy birthday cards and even though after I finished the cards I saw other cards using the same idea, I still want to share them and hopefully bring you some inspiration.

20150928_140007

The idea for these cards was to stretch a bit the stamps that are in this set, so I took the big balloon stamp and used it to create some flowers. I like to include at least one project using the ”stretch your stamps’ idea, as I did for the last month’s kit also, as I believe it is a great way to give more value to my stamps. I first stamped the centers of the flowers so I could have a guide for positioning the petals and chose various dye and pigment inks to create my huge flowers.

20150928_135821

I tried various colors before deciding which to use and if you want to try this technique, I could say that this works best with inks that are not too dark, so you can get that petal overlaying transparency there. Once the petals were all stamped, I went back and re-stamped the center but this time with Versamark Ink and did some embossing with silver & gold powders.

To make my petals pop a bit more I used a white gel pen and made a dashed line all around the edges. Next I added the sentiment, a couple of sequins for some of the cards, aswell as a bit of Glossy Accents to the center of the flowers.

20150928_135741

Thank you all for being here and will see you soon with a new mini-series for the new Fall season:)

http://static.inlinkz.com/ppr.js

SSS September Card Kit 2015 Day 4

Happy Monday, everyone!

1_330506_FS

I am sharing today 2 cards that I made with the SSS September Card Kit. Both cards follow the same layout, I wasn’t sure if I could make the how-to video when I did my first card, but then I decided to share the process also, so I made the second card similar to my first one, changing just the color of the cardstock.

20150927_153517

As you see, I used once again the acetate prints and I created some windows for the front of my cards; used a bit of liquid glue to adhere them down and I really love this method for incorporating these beautiful transparencies.

20150927_153451

I also used some of the stamps from the set, I stamped and embossed a small border at the edges of the front panel and also stamped a polka dot pattern with the small circle stamp.

20150927_153429

For the sentiment I used the ”let’s celebrate” stamp and did some heat embossing. To finish my cards, I added some gold sequins. The layout is very easy to make and the effect is just so gorgeous. At least to my eyes it is 😀

20150927_153505

You can see the how-to video right below or watch it HERE on my Youtube channel. Thx for joining me!

http://static.inlinkz.com/ppr.js

SSS September Card Kit Day 1

Hello!

I am happy to share with you the latest card kit from Simon Says Stamp that I just got! Yay! This is another great kit with so many goodies included!

1_330506_FS

For today’s card I used the mini stencil that comes with this kit and picked 4 inks that I thought coordinated better with the color scheme of this kit. The inks are all dye inks from SSS, but they blend so nicely and are just perfect for stenciling. Once my panel was all colored, I trimmed it out and adhered it with a bit of foam tape to the back for some extra dimension.

20150905_172922

I also stamped and fussy cut the balloons included with the stamp set, and I really have to say that I just love the shape of these balloons so much! They are so fancy:) I absolutely love the sentiment stamps from the set aswell, the font is simply delicious and so unique! I stamped the Happy Birthday with some black ink and for the tails and bows of the balloons I chose grey ink.

To decorate my card I just glued several sequins and added a bit of shimmer with the Wink of Stella in clear.

20150905_172942

So this was the first idea that came up to my mind while I was flipping through all the goodies in the kit, I hope you will join me for the next 4 days also where I will have projects made with this wonderful kit.

You can see the video right below or watch it on Youtube HERE.

Thx for joining me!

http://static.inlinkz.com/ppr.js

Sweet Birthday Jars /Pattern Paper Stamping

Hello, my crafty friends!

I am sharing today a very sweet card that I had so much fun making. I did what I enjoy most about this hobby and that is stamping. I just love to stamp! And when I get to create backgrounds with my own stamps I am so so happy!:)

Everytime I do cleaning in my craft room I bump over some of my old stuff so I pulled out this mason jar stamp that is so adorable (I love mason jars!:D) and some flowers & leaves and with my favorite SSS inks I started creating my colorful background. To protect my jars I used a mask for each of them, that I cut out from a label sheet. To add a bit of shading to my jars I went in with a very light Copic grey marker and did 2 layers of color, actually.

20150816_144318

I added labels to my jars using a Sweet stamp in the same colors that I stamped the jars and all the rest. For my greeting I die cut a Birthday from white cardstock and for a bit of dimension I actually glued 3 pieces together. To adhere the die cut I used my new mini bottle that has a fine, long nozzle which I filled with my favorite glue, that is Multi Medium Matte.

Added a bit of shimmer to the labels and clear sequins for a touch of light and my card was all done. I so love the final result that I could make this layout in so many other colors and create a lovely Birthday set!:)

You can see how I created this card watching the video below or on my YT channel HERE.

Thx for stopping by!

Floral Pattern / Clean & Simple

Hi all!

There’s a beautiful sunny day here in Rome and everything in my garden started blooming! yay! So that inspired me to make a floral card for today.

20150606_103443

I used the same stamp set from yesterday when I made the watercolor card. I like to make several cards with the new stamp sets that I get, otherwise I will put them aside and forget about them. It happened so many times so I decided to use any stamp set as much as I can before switching to a new one. Therefore if you see cards using the same stamp set now you know the reason why:)

20150606_103426

So I started this project by masking the bottom side of the card with some painter’s tape so that I could concentrate my layout only to the top of the card. I chose some inks that go well together and stamped the outline of the roses with a darker ink and the center with a lighter ink. To avoid overlaying the flowers I created some masks out of a sticky note sheet.

Once I finished stamping all my flowers & leaves, I added a thin strip of cardstock to separate the pattern from the rest of the card and stamped my sentiment with a black ink. I also added a small cute bow there and a bit of shimmer to the flowers.

This was my card for today, for any questions, please leave me a comment down below. Thank you all for being here:)

Create a Card with One Stamp Set Only Day 4

…and how I shoot my videos:)

Hello!

Actually today is ”make 3 cards with one stamp set”, lol:) I chose a Hero Arts & Basic Grey stamp set and made 3 quick cards. I’m sure that I will do more as while I was working with this set, I realized it is pretty awesome and versatile.

Here is the stamp set called RSVP.

71s3vxaTeRL._SL1200_

I used the cute party hat stamp to create a fun background on 2 of my cards. The small stamps are always perfect for this technique and you can have a lot of fun experimenting with them:)

20150518_142253

The Wish Big sentiments are embossed with silver powder and I die cut them using a circle die. You can see all the steps in the video, btw 🙂

20150518_142215

For my 3rd card, I kept it all more simple and added a bit of interest with some strips of colored cardstock and sequins. Also I used the masking technique to stamp the balloons and banners.

20150518_142229

Here is a list of the supplies I used. I hope you found some inspiration and will give it a try to challenge yourself by using one stamp set to create a card..or even more, hihi 🙂

In the video I mentioned that I will show you how I record my videos. I don’t have any expensive video camera and tripods or other stuff like that, I just use the ”stick” that people use for making selfies:)) Here is a photo of how I ”installed” mine to shoot my tutorials, lol! Now to make the stick stay down into my box there, I just placed some heavy notebooks at the bottom of the stick, right on top, and this way it won’t move when I mount my phone on.

20150518_142053 20150518_142127

These are extendable also so they are perfect for how I use them and they don’t cost much either. I will put some links below so you can check them out if you want.

Thank you for dropping by!

Tracing a Stencil Onto Paper

Hello!

Hihi, I couldn’t stay away from trying the tracing technique onto paper also, so I made another card using the Poppies stencil by La Coppia Creativa.

stencil-la-coppia-creativa-papevoro

I created my background with a stripe stamp from Simon Says and using black ink. I just had this in mind for days, to put a red flower against a black striped background, so I finally made it:)

20150508_181057

I traced the flower onto some white paper and cut out all the petals out and the stem also. To be sure that I will adhere them in the right shape, I brought the same flower onto the background panel and then adhered the petals with foam dots for extra dimension. I just love the raised effect and even if it was a pain cutting out those small pieces and adhere them down, it was totally worth it!

20150508_181003

You can see in the video that I did some card ‘surgery’ as I forgot to emboss the sentiment before adhering the background piece to my card base, so I just had to unglue everything and add the strip. But in the end nothing shows, so yay!

20150508_114243

Here is the video and also the list of the supplies I’ve used. Thank you all for your kind visit!:)

List of supplies: La Coppia Creativa Papavero Stencil / SSS Love This Stamp Set / Bazzill Vellum Cardstock / Memento Tuxedo Black Ink / WoW Metallic Brass Embossing Powder / Distress Ink Festive Berries / Distress Ink Peeled Paint / Clearly Besotted Fabulous Fuchsias Stamp Set / 3M Scotch Foam Tape Roll / ZIG Wink Of Stella Clear Glitter Brush

Simple Birthday Card / Gold & Teal

Hi all!

I love making birthday cards and when I find a way to make them fast and simple, I’m so very happy:) Today’s card is almost a one layer card and I am working on a beautiful teal heavyweight cardstock from Bazzill.

20150502_122842

For this card I used 2 stamp sets from Winnie&Walter. I stamped the cupcake several times on the front of my card using a teal ink, as I was looking for a tone on tone effect. On top of all those cute cupcakes I embossed with gold the  sentiment ”happy birthday”.  I then die cut the edge of the front side of the card using a curved die and adhered a piece of patterned paper underneath. And that’s it, simple & fast, yet very very pretty!:) The colors that I used for today’s card decorate enough my layout so I chose to keep it clean & simple.

20150502_122911

I leave you with the video and I thank you all for dropping by!

Here is a list of all the supplies I used: Bazzill Candy Necklace Cardstock / Winnie&Walter Sugar Rush Stamp Set / Winnie & Walter The Big, The Bold and The Happy Stamp Set / Versamark Embossing Ink Pad / WoW Metallic Brass Embossing Powder / SSS Stitched Slopes and Hills Die / My Mind’s Eye Mildred Paper Pad / SSS Teal Dye Ink / Bo Bunny Clear Acrylic Block Set