Vellum Window Card

Hello, everyone!

Lately it is such a struggle to find a bit of spare time to make some cards, I hope things will get back to normal soon as I really miss playing in my craft room:)

Today’s card is a very simple, yet lovely card, that I made using this new stamp set from Prima aswell as the sentiment stamp set from WPlus9. I did a lot of embossing on this card, first for the pretty flower bulbs, then for the sentiment and the cute butterfly.

20160414_120848

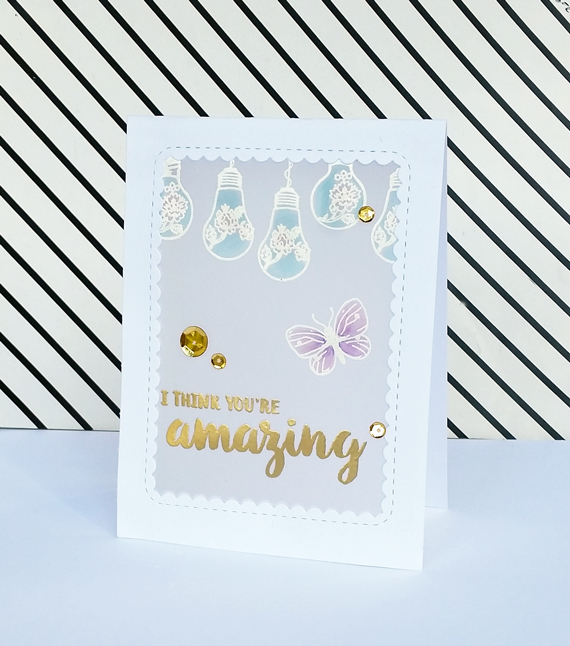
These bulb stamps are just so pretty and unique and as I wanted to add a bit of color to them, I used some of my Copic markers and colored to the back of the vellum.

20160414_120927
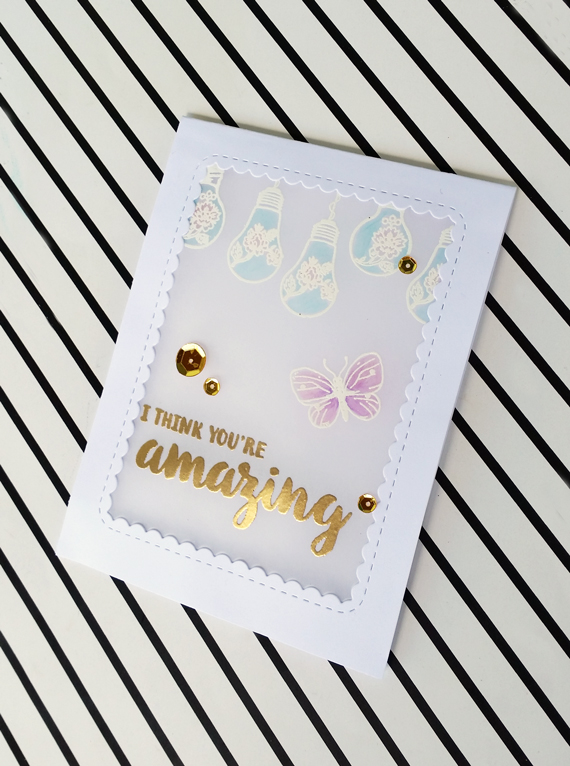
I wanted to have a vellum window on the front of my card so I used a window die to create it. I then adhered the vellum panel to the back of the window using some strips of adhesive tape. And just to hide that adhesive on the inside I die cut another window panel and glued it right on top of the vellum one.

20160413_180925To finish my card I added several gold sequins here and there. This card can easily be transformed into a shaker card and I think it would look awesome!

You can watch the how-to video below or HERE on my YouTube channel.

Thank you all for your patience and for stopping by each time there is a new blog post, I really appreciate it!

Best of wishes and see you all soon!


A Cup of Cheer / Simon Says Stamp Cups & Succulents

This is my second post of today. Luckily I have more free time lately, so I will post more often, that will be for the days when I won’t be able to do it, hihi:)

I have this stamp set from Simon Says that’s called Cups & Succulents that I bought months ago but still haven’t got the chance to use it. I believe it’s simply adorable, love the flowers and the cups included and the sentiments fit perfectly on top of those cute cups.

20150511_171007

For cutting my panel I used a die from La Coppia Creativa. I used this die to create some inserts for my planners also, love the shape of it and it also has stitched lines all around the edges. I wanted to keep my layout simple, so I concentrated everything on this die cut panel. The pot and the flowers are colored with some Prisma pencils and gamsol and then I just fussy cut them with my sccisors. There are also coordinating dies for this stamp set. So awesome! Haven’t put my hands on that one yet:) I embossed the sentiment with white onto a piece of vellum and mounted all with craft foam onto my card base.

20150511_135941

I hope you can find some inspiration here today and I thank you all for dropping by!

imballaggio-personalizzato

Embossing with Dies

Here is a technique I like so much, but I often forget using it, and that is embossing with metal dies.

To do so you need a metal die, a rubber silicone mat and of course a die cuttting machine. I have the Big Shot, but you can use any machine.

I recently got this beautiful die from La Coppia Creativa and I just love it. It cuts perfectly and it comes with several coordinating clear stamps. And so I used it today for my project that I will present on their blog’s Gallery for December.

fiore-all-angolo (1)

20141205_125439

To emboss my card, I used the multi-purpose platform with tab 1 opened, a cutting plate, then I placed the rubber mat on top, the card on top of that, then the die and closed the ”sandwich” with the other cutting plate. I passed all through my Big Shot and look what a lovely embossed effect you can get with this technique.

20141205_125514

I used the die to cut several petals out of some white cardstock that I colored with various shades of red and glued them onto my card following the embossed template for the first row of petals and alternate the other ones. I just wanted to create a poinsettia to make this card perfect for the holidays.

20141205_125458

At the center I placed a dot of glue that I covered with gold glitter. I used gold for the sentiment also and the lovely pearls are made with Liquid Pearls.

I couldn’t not use the glitter pen for the flower, so I added it all over my red petals:)

20141205_125535 20141205_125448

I link you the products I used and also the link to this wonderful La Coppia Creativa Flower Corner Die